


Monday, February 9, 2009
Just Curious...
Sunday, February 8, 2009
The Housewife Wannabe Cooks: Roasted Garlic Mashed Potatoes
So I began the internet search. I didn't want anything too complicated and I didn't want to buy stuff that I would not have another need for for another 8 months. I finally settled on this one from allrecipes.com since I love the flavor of garlic. It turned out really well and was suprisingly easy. No need to be a seasoned housewife. Which is good. Since I'm not.
Ingredients:
2 lbs. potatoes
1/2 c. milk
4 T. butter
salt and pepper to taste (I used sea salt and seasoned pepper)
1 medium head garlic
1 T. olive oil
1. Preheat oven to 350.
2. Drizzle olive oil over garlic and wrap in aluminum foil. Bake for one hour.
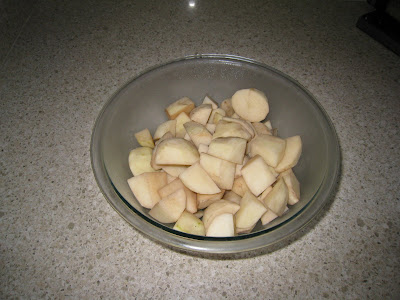
3. Boil a large pot of salted water. While water is heating, peel and dice potatoes into quarters.
4. Add potatoes to boiling water and boil until tender, approximately 15 minutes.
5. Squeeze softened garlic cloves after cooled.


ENJOY!
Thursday, February 5, 2009
Wednesday, February 4, 2009
Living Room Transformation: Part I
Many of the things we loved included updated floors, kitchen and bathroom counters, and most of all, the floorplan. Our living room is in the middle of the house and is incredibly open and airy. The former owners however had absolutely NO TASTE and decided a dijon mustard with a hint of baby shit green would go beautifully with the naturally red undertones of the brick fireplace and hardwood floors. See exhibit A:


Repainting the living room (and the freshly painted avocado green dining room) were definitely number one on our priority list when we moved in. However it's difficult to find manual laborers who will take credit card as payment, so we had to wait until we had saved enough liquid cash to paint. Which means I felt like I was living in a baby's diaper for the first four months we lived in our house.
BUT! HAZZAH! one day in November we realized we had saved enough money. So we had our living room, dining room, and entryway painted. See exhibit C:


We are thrilled with our purchase and are looking forward to our additional throw pillows coming in.
I also struggled with the purchase of a TV stand that would match a coffee table and an end table. I know that some people might find all matching incredibly boring, but I have to indulge the OCD in me. We finally settled upon this collection from Haverty's. The lovely woman at Ethan Allen might not be pleased. But we are:


Yes, I realize there is no rug, our furniture is on no scratch pads, and the walls are blank. We're working on it. And at the rate we're going, we should have wall hangings sometime in July.
Monday, February 2, 2009
You Know What's Embarrassing?
Sunday, February 1, 2009
The Housewife Wannabe Cooks: Cakeballs

3. Stir in almost an entire can of frosting/icing and mix thoroughly. I found it was best to use my hands.

mmm... chocolate-y!
4. Try not to eat the whole pan with a spoon. You're not quite finished yet and failing to complete step four properly could lead to a day spent in bed or on the toilet. And no one will want to come eat your balls if that happens. Do no ignore the teachings of step 4!
5. I refrigerated the mixtures overnight, but I would recommend refrigerating them at least for 30 minutes. If they're a little cold, step 6 is easier.
6. Roll into 2 inch balls.

7. Freeze for at least 30 minutes.
8. Melt the almond bark/candy wafers according to package directions.
9. Roll the cake balls in the melted almond bark/candy wafers.

Ignore the fat forearm - this camera has some really bad angles! Maybe something's wrong with it. Like how our dryer has magically started shrinking all my clothes!
10. This is where the frustrating part comes in if you are type A or obsessive compulsive like myself. Transfer the candy balls to a cookie sheet lined with wax paper. BE FOREWARNED - Unless you are a professional or have some sort of crazy dipping tool, the balls will not come out looking perfectly round or smooth (If you are a professional though, what the hell are you doing reading my website?!? You should not be coming to me for advice). I used a fork to lift them out of the candy but tranferring them to the cookie sheet result in all sorts of dents and imperfections in the candy coating. Again, this is why I'm practicing with Matt's friends.
 Hmm, the close up shot really shows how imperfect they are. Maybe a shot from above would look better?
 Guess not....
Here's the final product.

I melted some plain white and chocolate almond bark and drizzled over the balls for added dramatic effect. And also to hide the imperfections in the balls. Probably should have added some food coloring to the chocolate so that it would have looked more black... but I was exhausted. And I live in Dallas. No one here cares about who wins. Good thing they taste delicious! ENJOY!